


 Seeds and Germination
 Grow Setup
 Seedling Stage
 Vegetative Growth
 Pre-flowering
 Flowering
 Ripening
 Harvesting
 Drying
 Curing
 Troubleshooting
 Training Techniques
Drying Cannabis
 15 Minute Read
PUBLISHED: July 29, 2024
Drying and curing cannabis are crucial steps in the cultivation process that significantly affect the final quality, potency, and flavor of the marijuana plant. Proper drying and curing can enhance the overall experience, while improperly handled buds can lead to harsh smoke and reduced potency. This comprehensive guide will cover the essentials of drying and curing cannabis, from basic concepts to advanced techniques.
Drying and curing cannabis may seem straightforward, but they involve careful attention to detail and an awareness of plant chemistry – don’t worry, it’s not rocket science. In this guide, we will explore the scientific and practical aspects of these processes, explaining how they impact the stability, aroma, flavor, and efficacy of the final product.
We begin with an introduction to what drying and curing entail and why they are pivotal in the post-harvest phase. Drying is the first critical step after harvesting, focusing on slowly removing moisture from the buds to prevent mold and preserve desirable compounds like terpenes and cannabinoids. We will discuss the ideal conditions for drying, how to set up your drying space, and the signs that your cannabis is dried to perfection.
Following drying, curing is the next essential phase, which not only further reduces moisture to optimize storage but also enhances the chemical composition of the dried flowers. Curing is about fine-tuning the flavor, improving smoothness, and ensuring the longevity of potency when the cannabis is stored. This guide will cover how to cure your cannabis effectively, including techniques for monitoring and adjusting the curing environment, and how to troubleshoot common issues that might arise during the process.
Through this exploration, you will gain insights into how these techniques can be adapted to different strains and environments, ensuring the best results from your cultivation efforts. Whether you are a novice grower or looking to refine your skills, this guide aims to equip you with the knowledge and tools to master the art of drying and curing cannabis.
Understanding Drying and Curing
Drying refers to the process of slowly removing moisture from the freshly harvested cannabis, while curing is the controlled storage of dried cannabis in a way that allows chemical processes to enhance flavor, aroma, and potency.
Drying
After harvesting, drying is the first major post-harvest process. Drying involves removing the majority of moisture from the cannabis plants in a controlled environment, which is crucial for both quality preservation and the prevention of mold and bacterial growth.
Why Dry Cannabis
- Stops Biological Processes: Immediately after harvest, plants continue to undergo biological processes. Drying effectively halts these processes, stabilizing the cannabinoids and terpenes.
- Prevents Mold and Decay: Proper drying reduces the water content in the buds to a level that inhibits the growth of mold and bacteria.
- Prepares for Curing: Drying is a prerequisite for curing, as overly moist buds cannot be effectively cured and are prone to spoilage.
How to Dry Cannabis
- Environment Control: Maintain a room temperature of 60-70°F (15-21°C) with a humidity of 45-55%. Avoid direct light and excessive air flow.
- Hanging: Hang the plants upside down in a well-ventilated room or use drying racks.
- Duration: Drying usually takes about 7-14 days, depending on environmental conditions and the density of the buds.
Curing
Curing follows drying and is essential for enhancing and preserving the flavor, aroma, and potency of cannabis.
Why Cure Cannabis
- Flavor and Aroma Enhancement: Curing allows for the breakdown of chlorophyll and other remaining sugars and starches, reducing the harshness and improving the taste and smell.
- Potency Preservation: Slowly curing the cannabis can lead to a more gradual degradation of cannabinoids into more potent forms.
- Longevity: Properly cured cannabis can be stored longer without a loss of potency or flavor, thanks to the stabilization of the chemical components.
How to Cure Cannabis
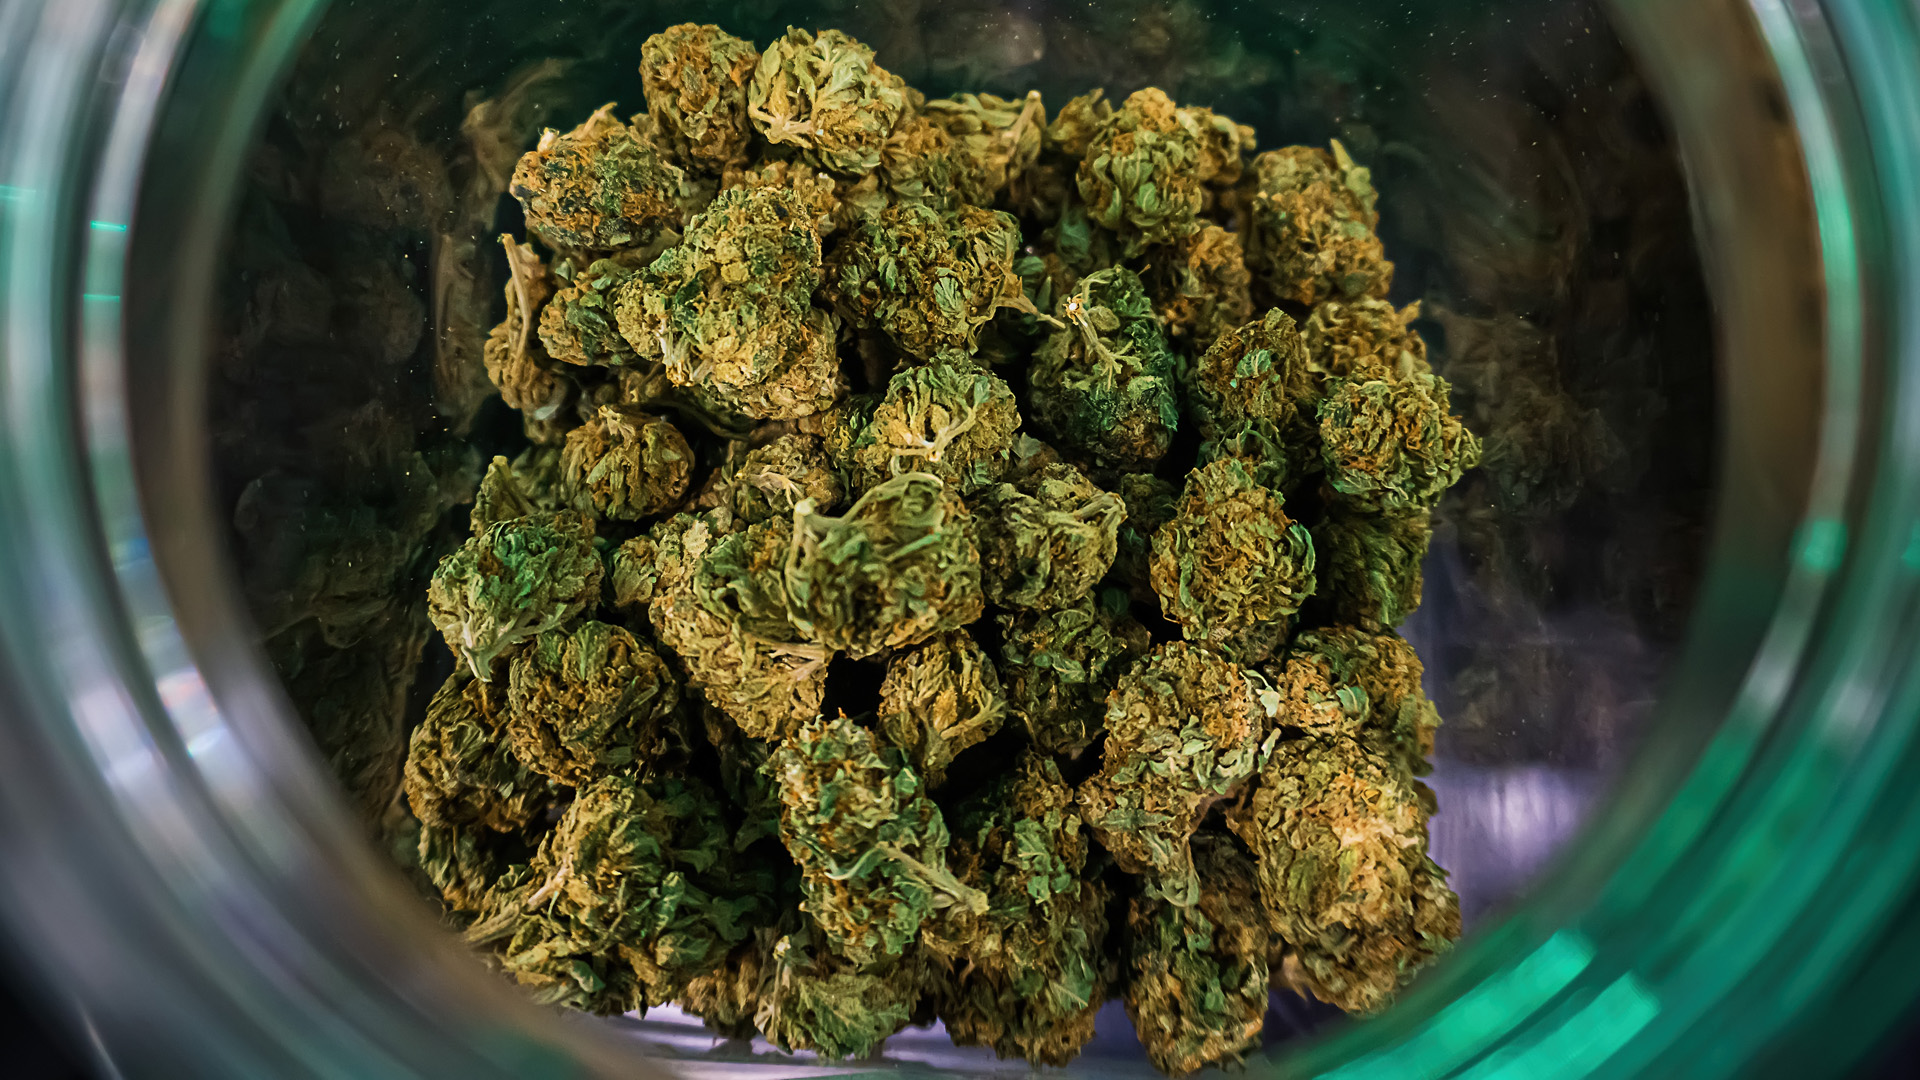
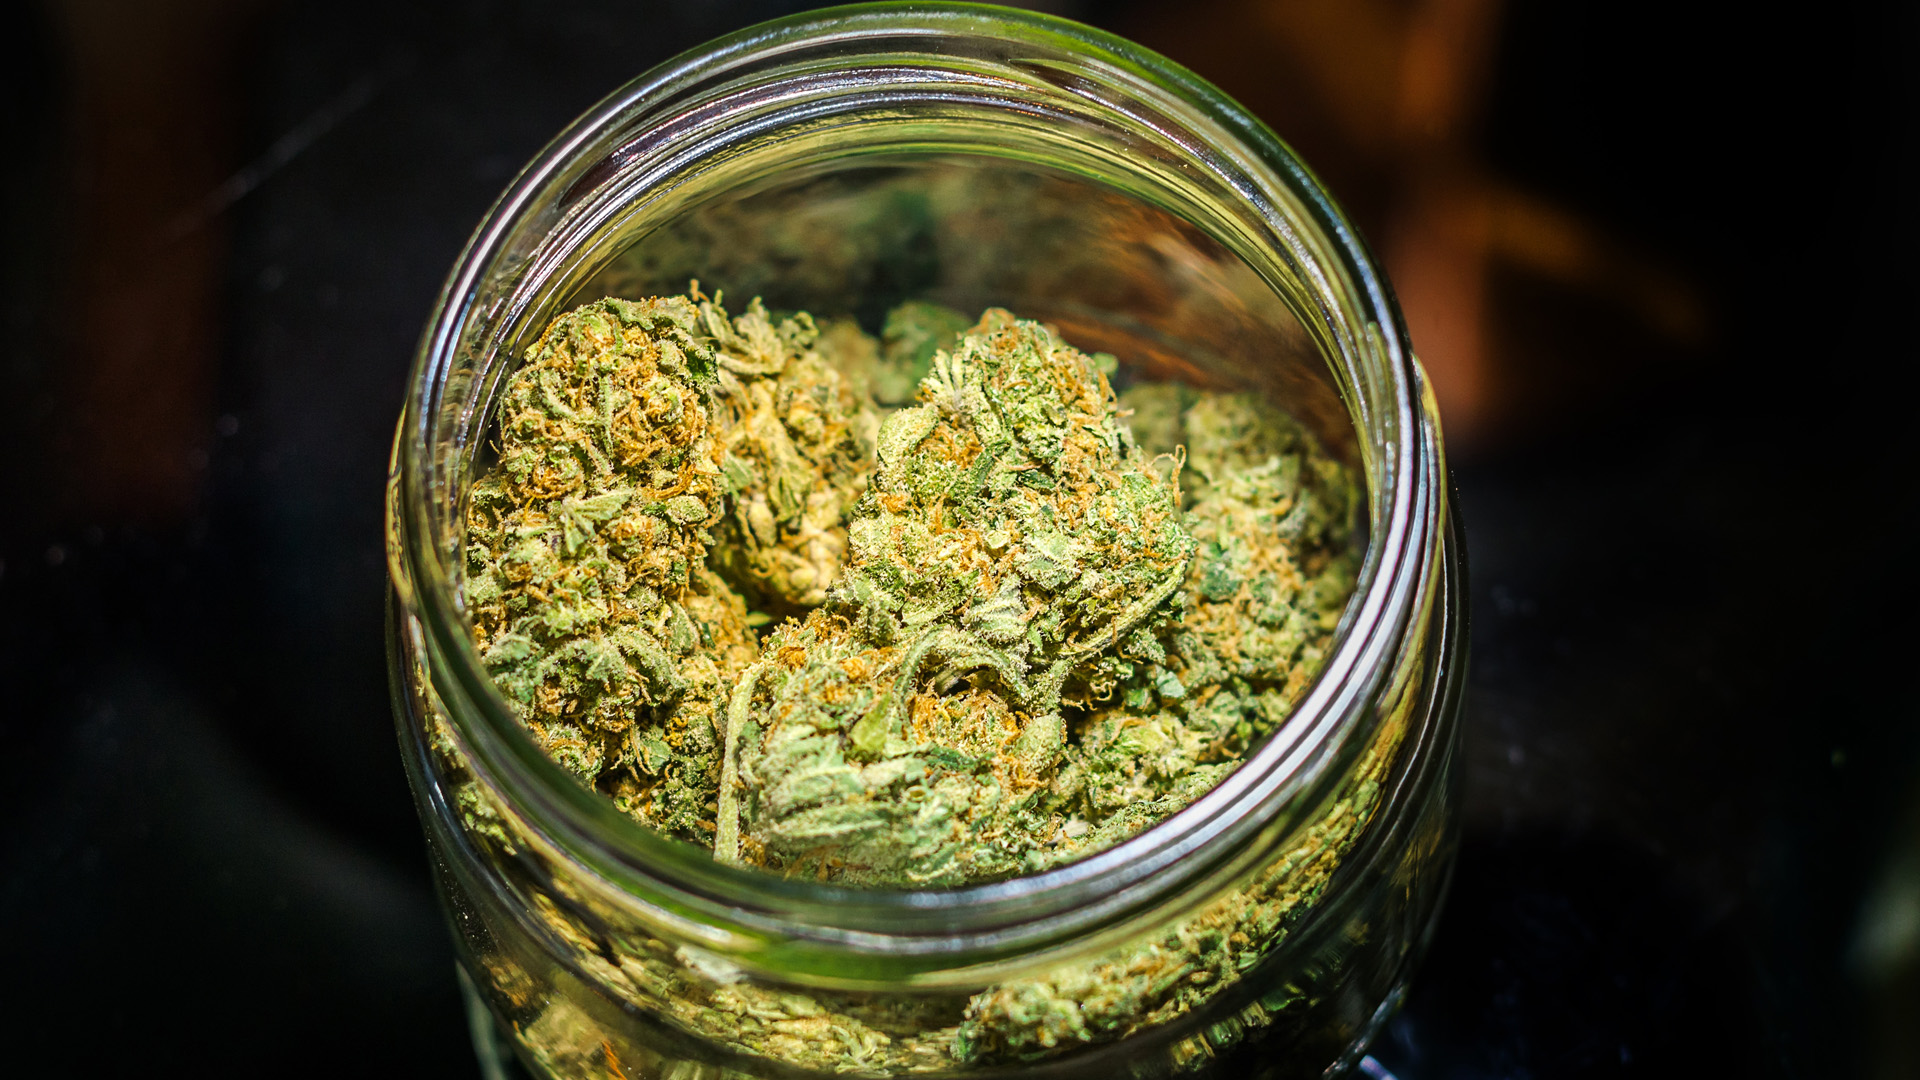
- Storage: Place the dried buds in airtight containers, typically glass jars, filling them to 75% capacity to allow for some air exchange.
- Burping: Regularly open the containers (daily for the first week, then less frequently) to exchange air and allow any built-up moisture to escape.
- Duration: The curing process can last from a few weeks to several months. The longer the cure, the better the overall quality of the cannabis will be.
Detailed Guide to Drying Cannabis
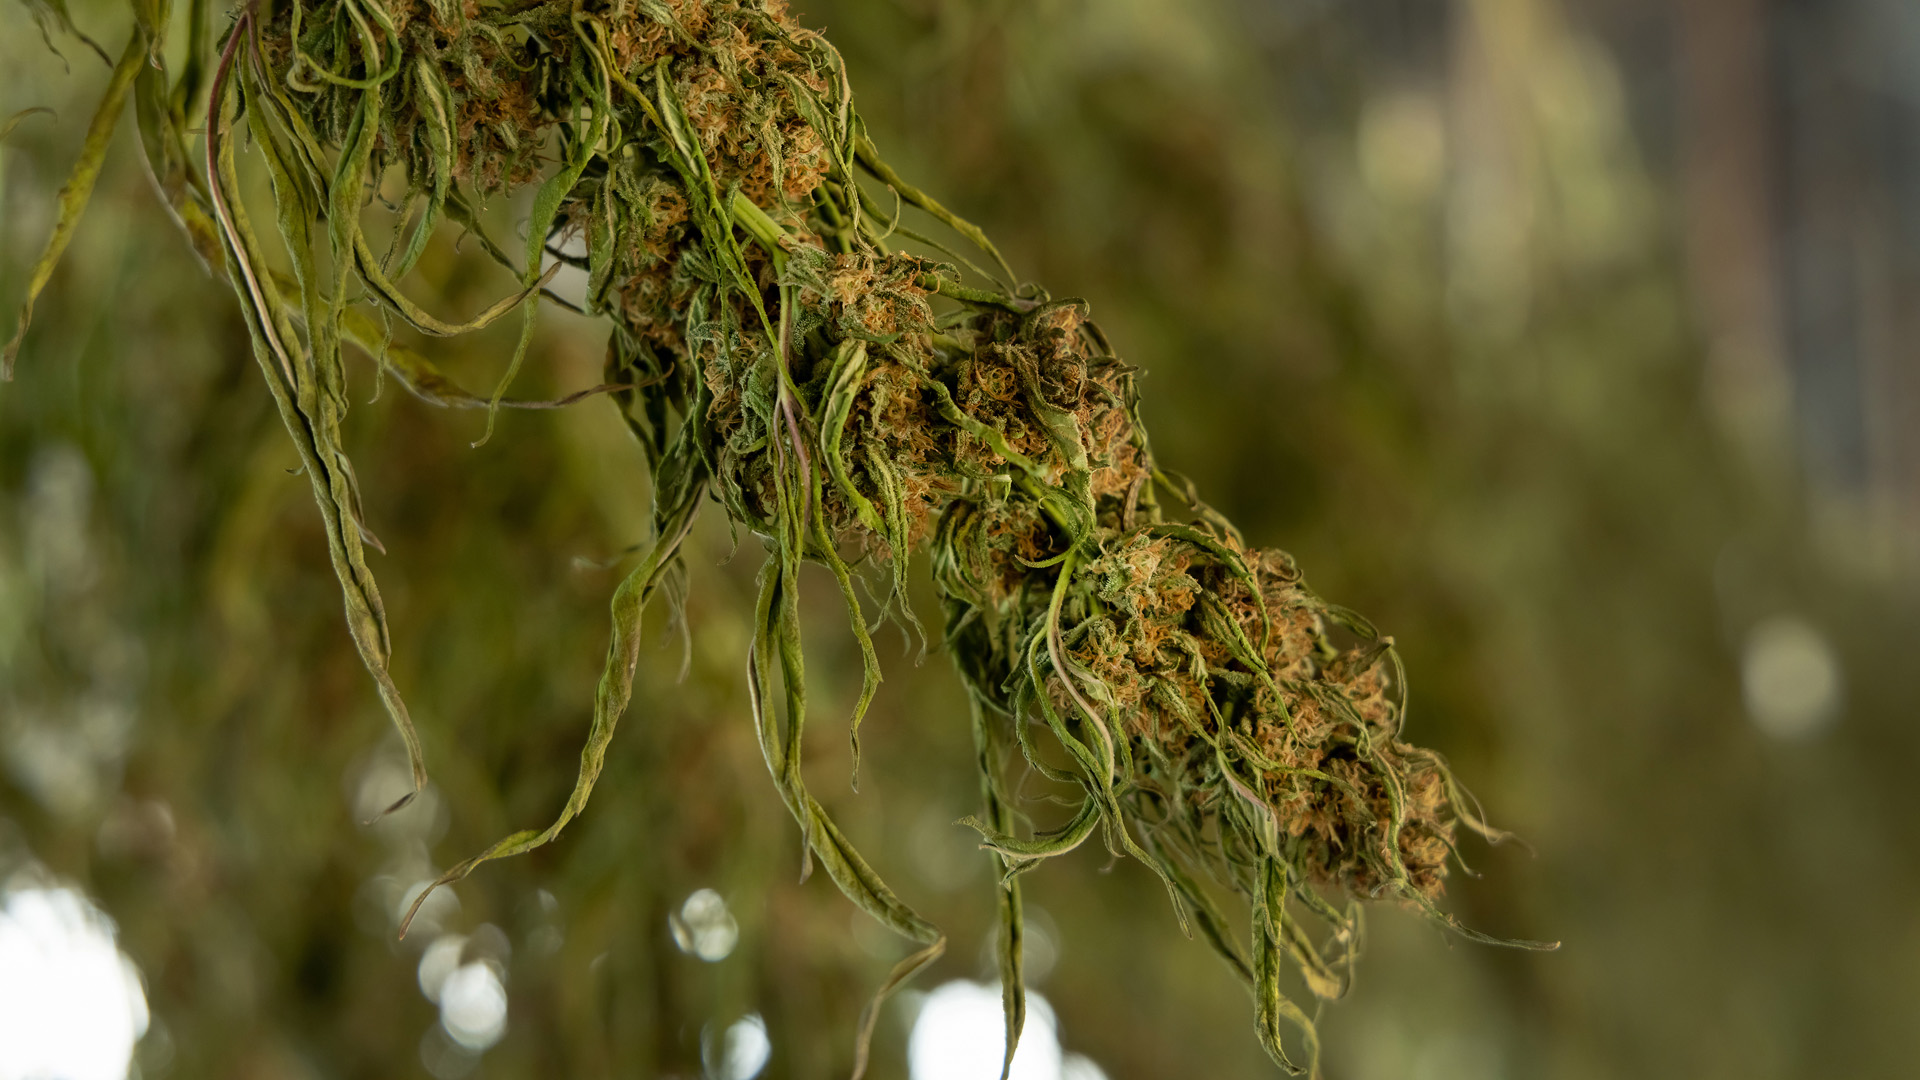
1. Harvesting
The timing of the cannabis harvest is pivotal in determining the final quality of the cannabis. Trichomes, the tiny crystal-like structures on the buds, contain the cannabinoids and terpenes that define the plant’s potency and flavor profile.
- Visual Inspection: Use a magnifying glass to observe the color of the trichomes. Harvest when most trichomes have transitioned from clear to a cloudy white, with some beginning to turn amber.
- Tactile Checks: The plant should feel sticky, and the flowers should be firm yet slightly springy.
2. Trimming
Trimming involves removing the fan leaves and possibly the sugar leaves from the cannabis plant. The method of trimming impacts not only the aesthetic appeal but also the drying dynamics and final flavor.
- Wet Trimming: Done immediately after harvesting, this method involves trimming the leaves when they are still moist. This is generally faster and prevents excess leaf matter from absorbing resin from the buds.
- Dry Trimming: Performed after the drying process, this method allows the leaves to protect the trichomes during drying, potentially preserving terpenes better and resulting in a more flavorful product.
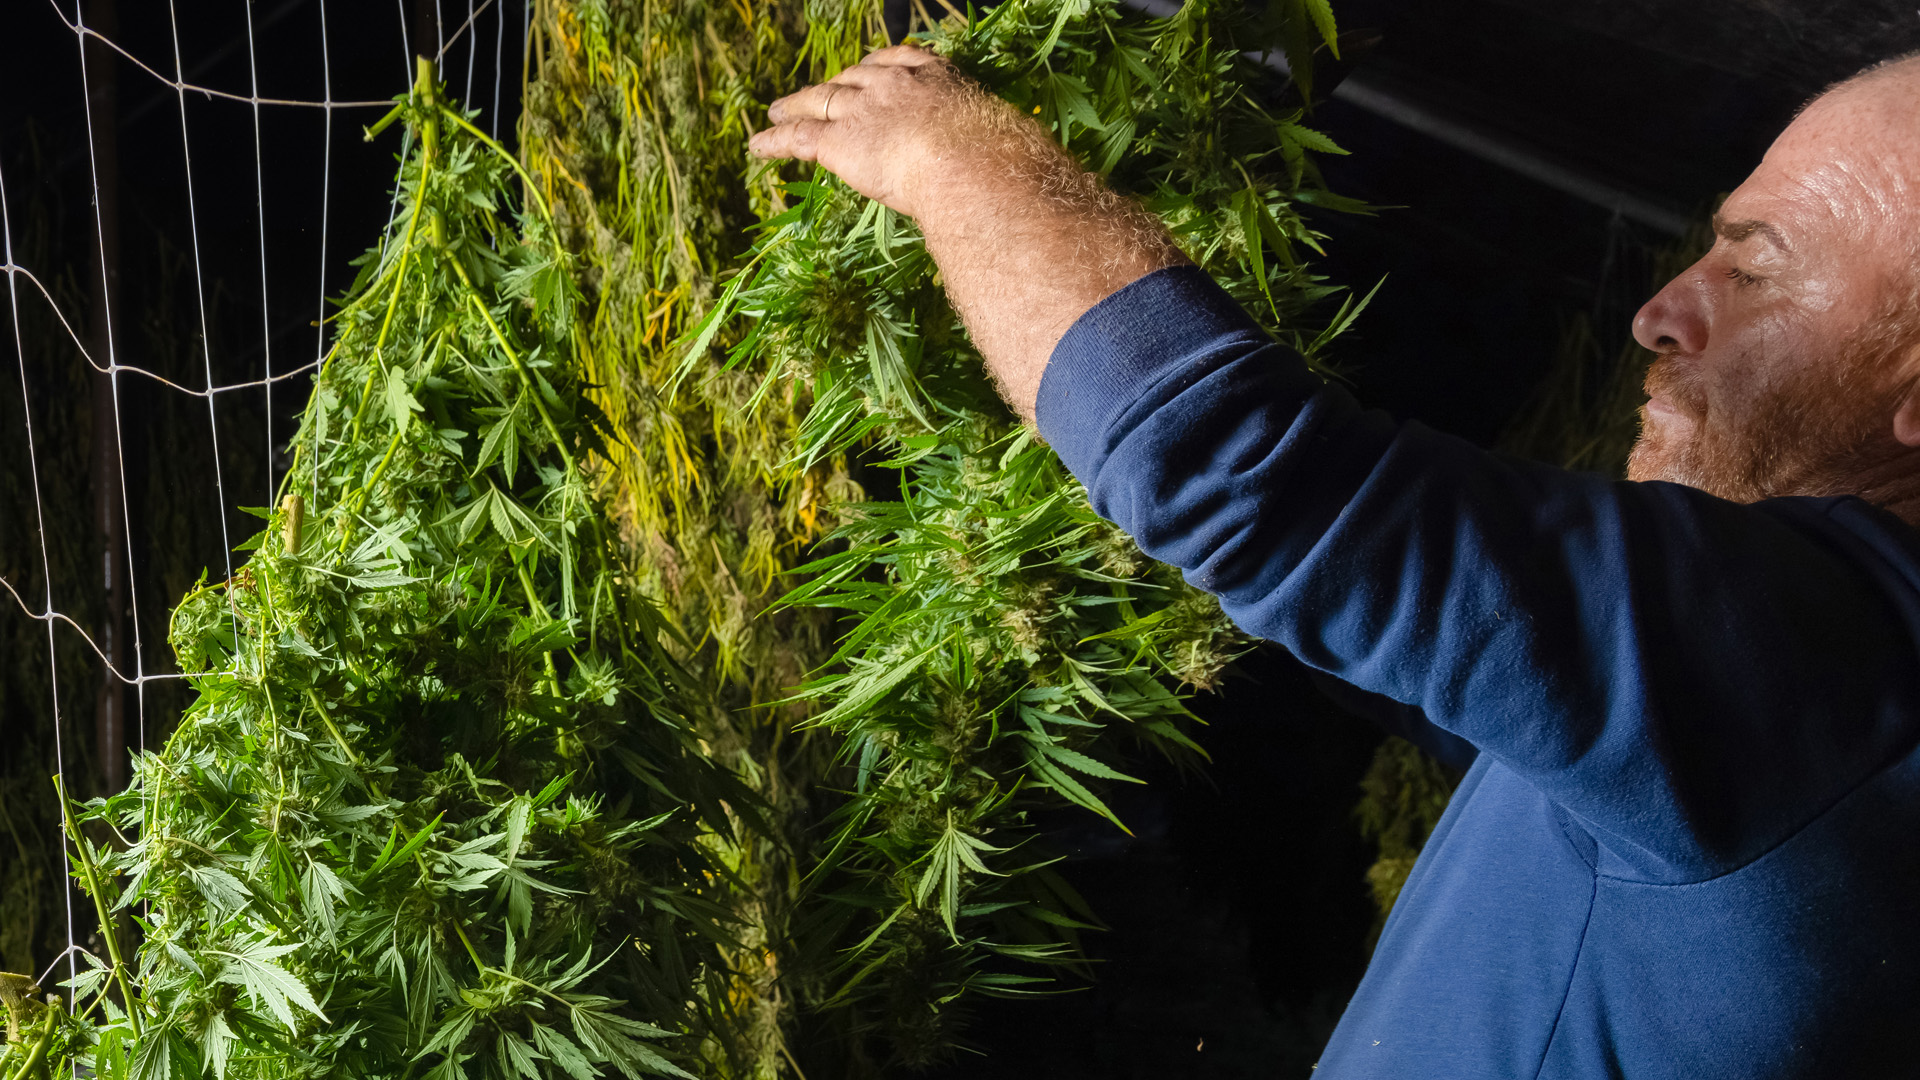
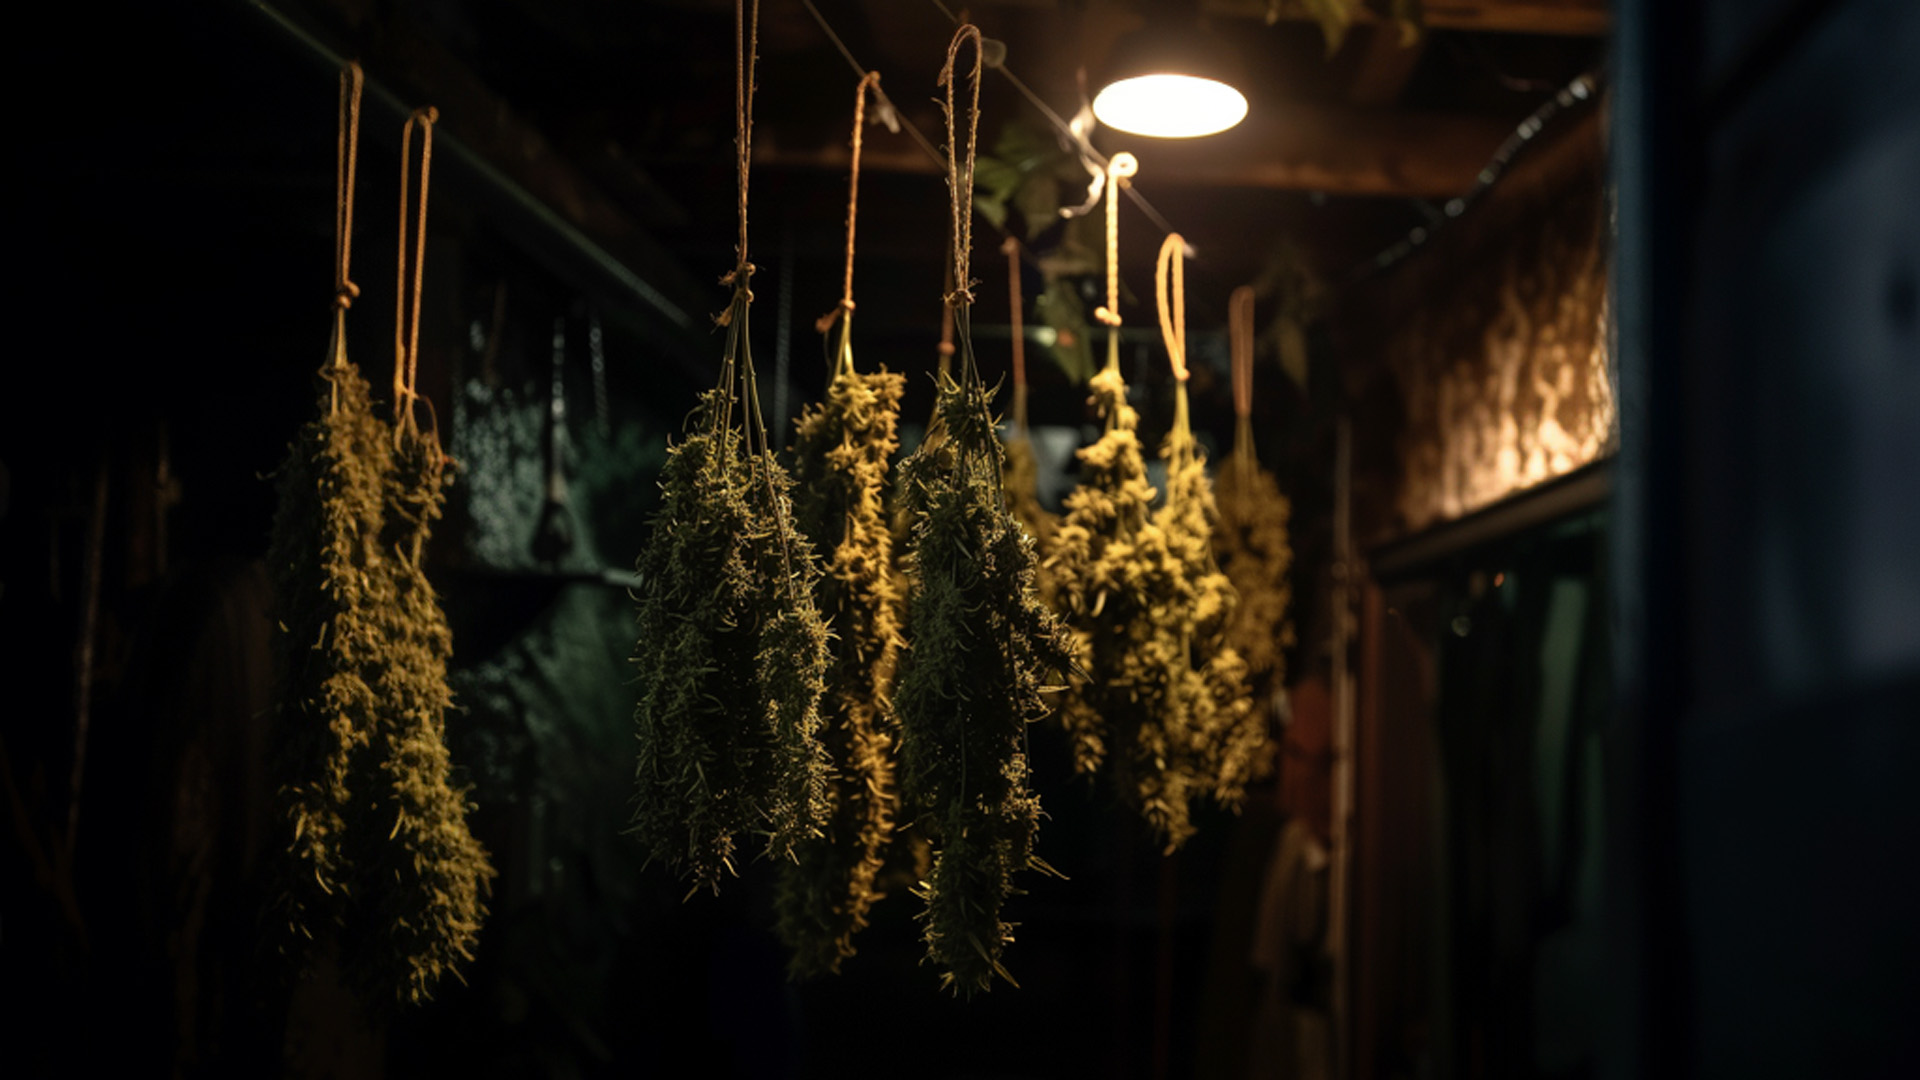
3. Hanging and Drying
Creating an optimal environment for drying is crucial to prevent degradation of cannabinoids and development of mold.
- Environment Setup: Ensure the room is dark, as light can degrade cannabinoids. Maintain a temperature between 60-70°F (15-21°C) and humidity around 45-55%. Use a hygrometer to monitor these conditions.
- Hanging Method: Hang the whole plants or large branches upside down on wires or racks to ensure even drying. Ensure there is enough space between branches to allow air to circulate freely.
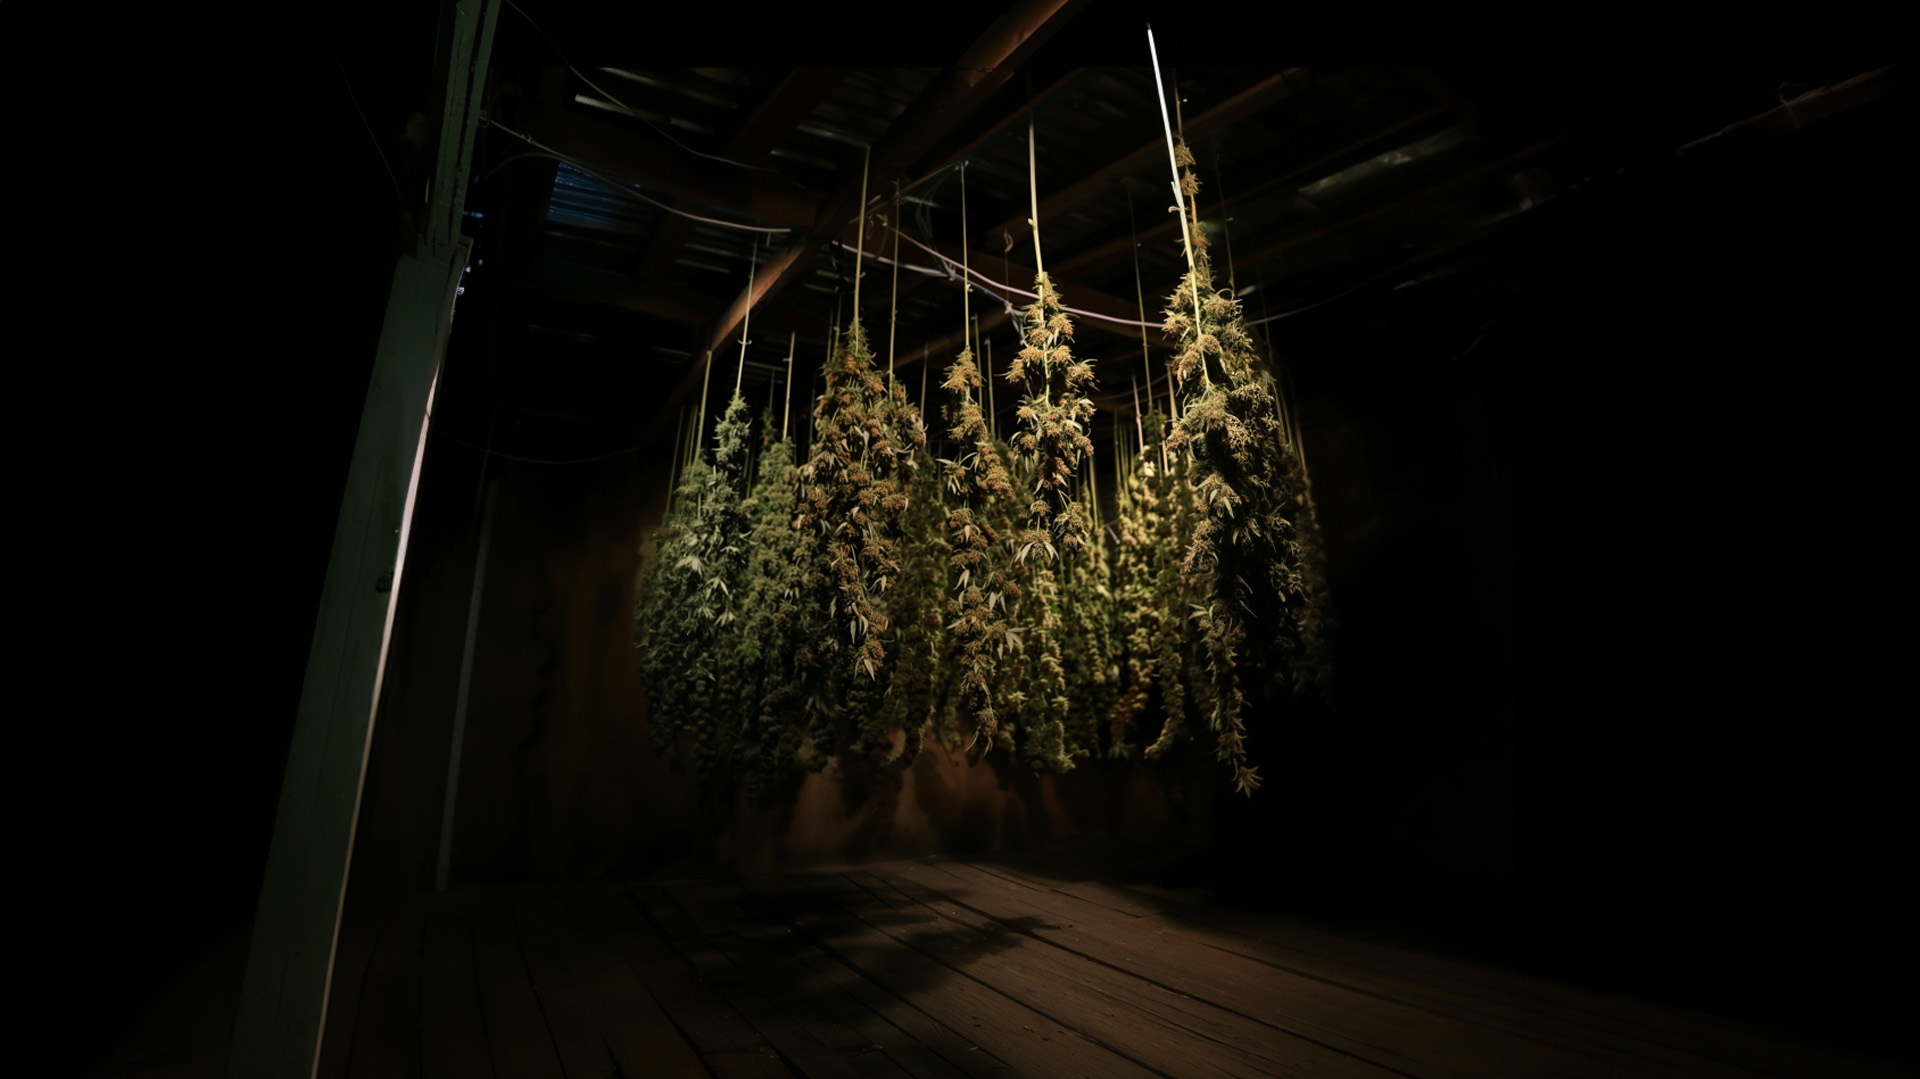
- Duration and Readiness: Drying typically takes about 7-14 days, depending on environmental conditions. Cannabis is ready for the next stage when the stems snap rather than bend, and the exterior of the buds feels dry to the touch.
4. Monitoring
Regular observation throughout the drying process is vital to catch any issues early.
- Daily Checks: Look for any signs of mold or mildew and check that the environment maintains the correct humidity and temperature.
- Adjustments: Be prepared to adjust the room conditions using dehumidifiers, humidifiers, or heaters to maintain the ideal drying environment.
Detailed Guide to Curing Cannabis
1. Initial Curing Phase
Proper curing starts with the correct storage of your dried cannabis.
- Storage: Place the properly dried and trimmed buds into wide-mouthed, airtight glass jars, filling them about 75% full to allow enough room for air.
- Burping: For the first week, open the jars several times a day for about 10 minutes each time to exchange air and allow any excess moisture to escape. This helps prevent mold and encourages a uniform cure.
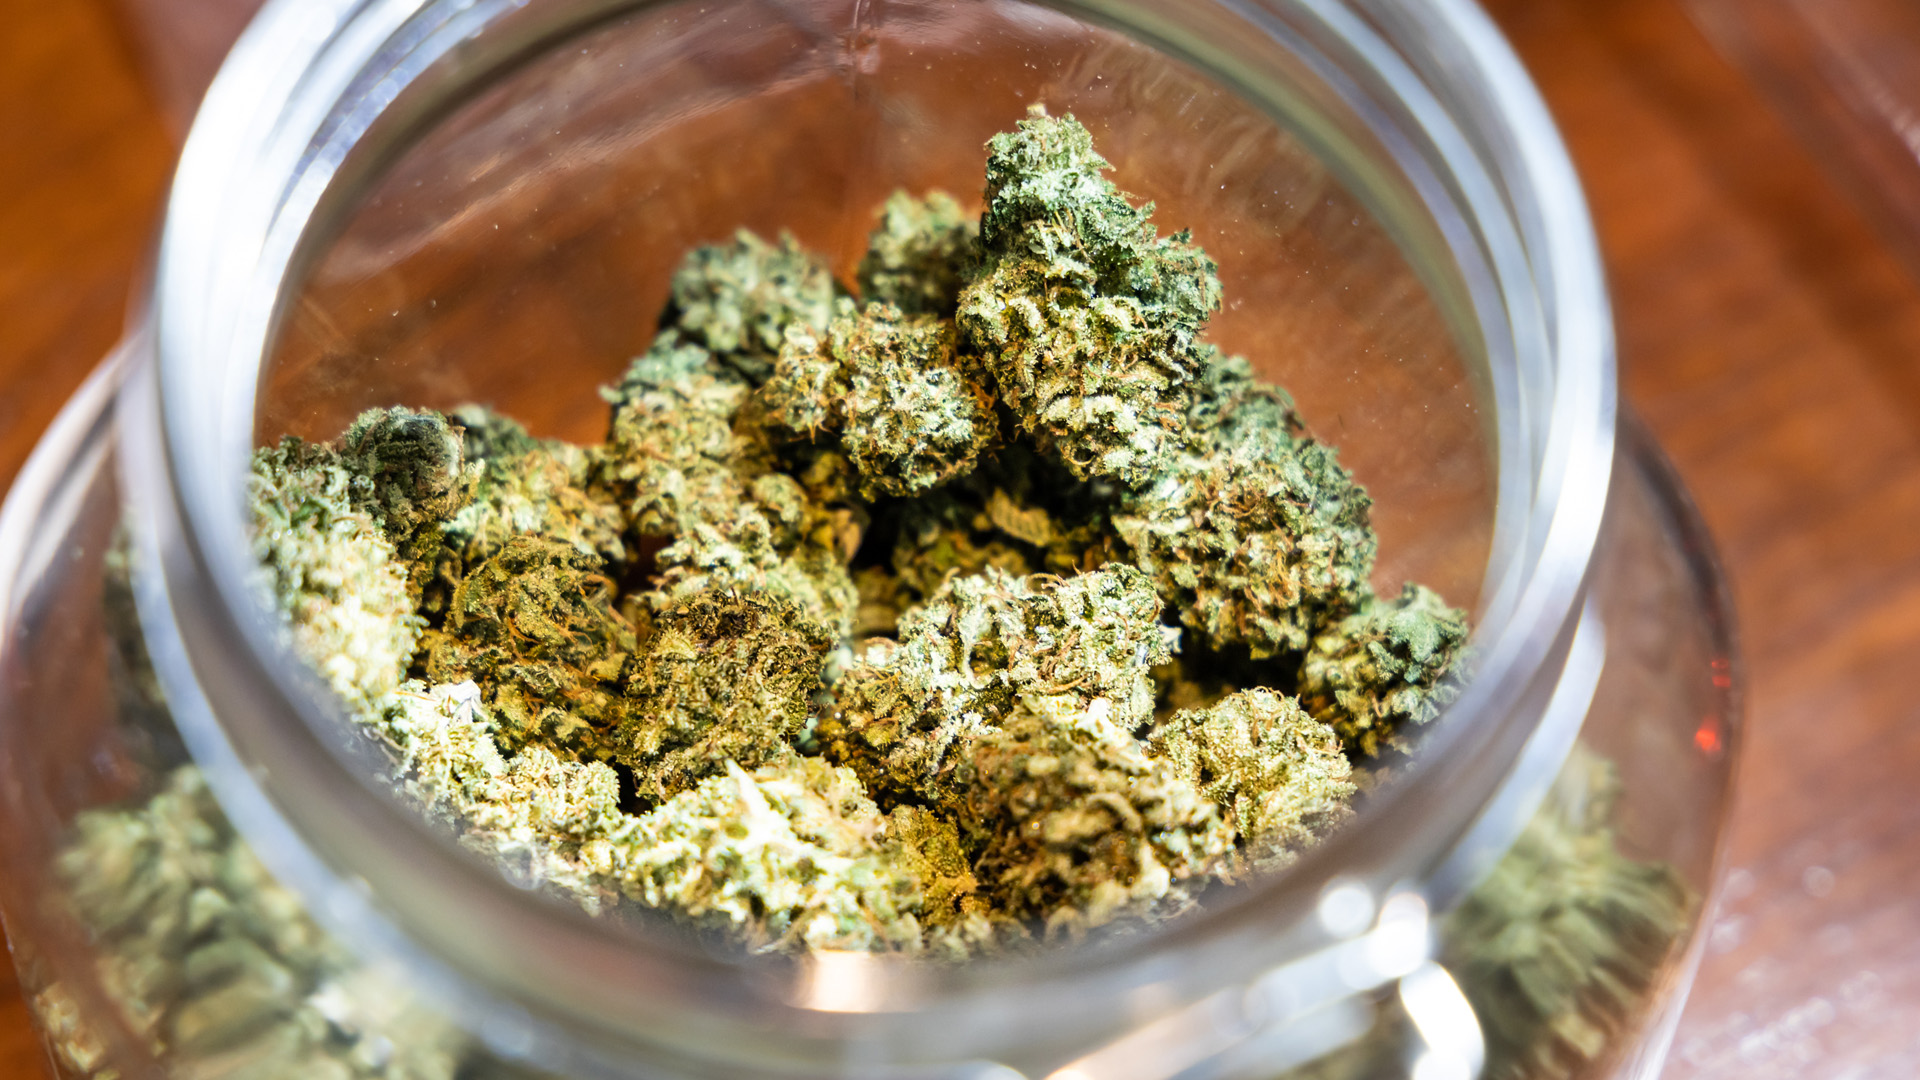
2. Extended Curing
After the initial week, the focus shifts from moisture control to flavor and cannabinoid enhancement.
- Reduced Burping: Reduce the frequency of burping to once every few days for the next two weeks. This helps stabilize the humidity in the jars, further maturing the cannabis.
- Long-Term Curing: After about a month, reduce burping to once a week or less. This long-term curing can continue for up to six months and is often used to enhance the complexity and smoothness of the smoke.
Advanced Curing Techniques
1. Boveda Packs
Humidity control packs, such as those offered by Boveda, can regulate the microclimate within the curing jars to maintain a specific humidity level (usually around 62%), which simplifies the burping process and ensures consistency.
2. Vacuum Sealing
For long-term storage, vacuum sealing can be an effective method to preserve the quality and potency of cannabis by removing air from the storage environment, thus slowing down the degradation process.
3. Cold Curing
Storing jars in a refrigerator or cool environment can slow the degradation of cannabinoids and preserve terpenes, leading to a more flavorful and potent product. Cold curing must be monitored closely to avoid humidity fluctuations that could promote mold growth.
Each of these steps, if followed with care and attention to detail, can greatly enhance the quality of the final cannabis product, maximizing flavor, potency, and overall consumer satisfaction.
Common Problems and Solutions in Drying and Curing Cannabis
When drying and curing cannabis, cultivators often encounter a few common issues that can significantly affect the quality of the final product. Here’s a detailed look at these problems—specifically mold, over-drying, and under-drying—and practical solutions to manage them effectively.
1. Mold
Mold is one of the most detrimental issues in cannabis cultivation, particularly during the drying and curing phases. It can develop quickly in environments with high humidity and poor air circulation.
Causes:
- High humidity levels exceeding 60% during the drying process.
- Insufficient airflow around and through the buds.
- Storing buds that are not sufficiently dried.
Solutions:
- Control Humidity: Maintain relative humidity levels between 45-55% in the drying area using dehumidifiers.
- Improve Air Circulation: Use oscillating fans to promote good air circulation, but ensure they do not blow directly on the cannabis to prevent uneven drying.
- Regular Checks: Inspect the cannabis regularly for any signs of mold, especially during the first few days of drying and curing.
- Proper Jar Size: During curing, use appropriate-sized jars to prevent overcrowding of buds, allowing air to circulate around them when the jar is opened.
- Burping: Open the curing jars regularly to let fresh air in and excess moisture out, which helps prevent mold growth.
2. Over-Drying
Over-dried cannabis can result in a harsh smoke and a significant loss of flavor and aromatic terpenes, which are volatile and evaporate at low humidities.
Causes:
- Too low humidity during the drying phase.
- Excessive air flow.
- Drying in an environment that’s too warm.
Solutions:
- Adjust Humidity Levels: Use a hygrometer to monitor the drying room’s humidity and maintain it at an optimal 50-55% level.
- Temperature Control: Ensure the drying room is at a stable temperature, ideally between 60-70°F (15-21°C).
- Slow Drying Process: Aim for a drying process that takes about 7-14 days. Shorter periods can cause the outer part of the buds to dry too quickly, sealing moisture inside that can lead to mold during curing.
- Rehydration Methods: If buds have dried too quickly, consider rehydrating them slightly using fresh cannabis leaves, fruit peels, or commercially available humidity packs designed for cannabis storage.
3. Under-Drying
Buds that are too moist can become breeding grounds for mold and mildew during curing.
Causes:
- Rushed drying process.
- Inadequate air circulation in the drying area.
- Harvesting during humid or rainy conditions without adjusting indoor humidity.
Solutions:
- Extend Drying Time: If stems are still bending and not snapping, extend the drying time before starting the curing process.
- Use of Hygrometers: Place hygrometers inside the curing jars to monitor humidity levels accurately.
- Layer Drying: Spread the buds out on drying racks if the initial hanging method leaves them feeling too moist. This method can help expose more surface area to air.
- Adjust Curing Technique: If buds feel too moist when placed in jars, leave the lids off for a few hours each day to allow more moisture to escape or increase the frequency of burping.
By addressing these common problems with thoughtful solutions, cultivators can ensure that their cannabis maintains its quality, potency, and aromatic profiles through the drying and curing processes.
Final word on Drying and Curing
Drying and curing are as much an art as they are a science. Each strain may require slight adjustments in the drying and curing process. By following these guidelines and being attentive to the specific needs of your cannabis, you can significantly enhance the quality of your final product.
This guide offers a solid foundation for understanding and executing the drying and curing processes of cannabis effectively. With practice and attention to detail, you can perfect these techniques to produce top-quality cannabis that is potent, flavorful, and smooth.
Mike Titan, the founder of Titan Seeds, is a seasoned cannabis cultivator and the mastermind behind the comprehensive grow guide available on the Titan Seeds website.