


 Seeds and Germination
 Grow Setup
 Seedling Stage
 Vegetative Growth
 Pre-flowering
 Flowering
 Ripening
 Harvesting
 Drying
 Curing
 Troubleshooting
 Training Techniques
Grow Environment
 15 Minute Read
PUBLISHED: July 30, 2024
Growing cannabis is like raising a kid. You need to create the right environment for them to grow up strong and healthy. This guide will walk you through setting up the perfect grow environment, focusing on three main areas: environment, lights, and nutrients. But before we dive in, let me share a bit about my own journey.
I started out in a tiny apartment in Hollywood, dreaming of making it big in the film industry. The hustle was real, and I needed something to keep the lights on. That’s when I stumbled upon cannabis cultivation. My first grow was a disaster—leggy plants with barely any bud. I was juggling auditions by day and trying not to kill my plants by night. But each mistake was a lesson, and each lesson brought me closer to mastering this craft.
Fast forward to today, and I’m here to share those hard-earned lessons with you. Trust me, there’s nothing quite like the thrill of seeing your plants thrive after you’ve poured your heart and soul into them. It’s a journey filled with patience, passion, and a bit of grit. Every successful harvest starts with a solid setup, and that’s what we’re diving into today.
We’ll cover everything you need to know, from choosing the right space to getting the perfect light and nutrients dialed in. So, let’s get into it and set up your grow environment like a pro.
Environment
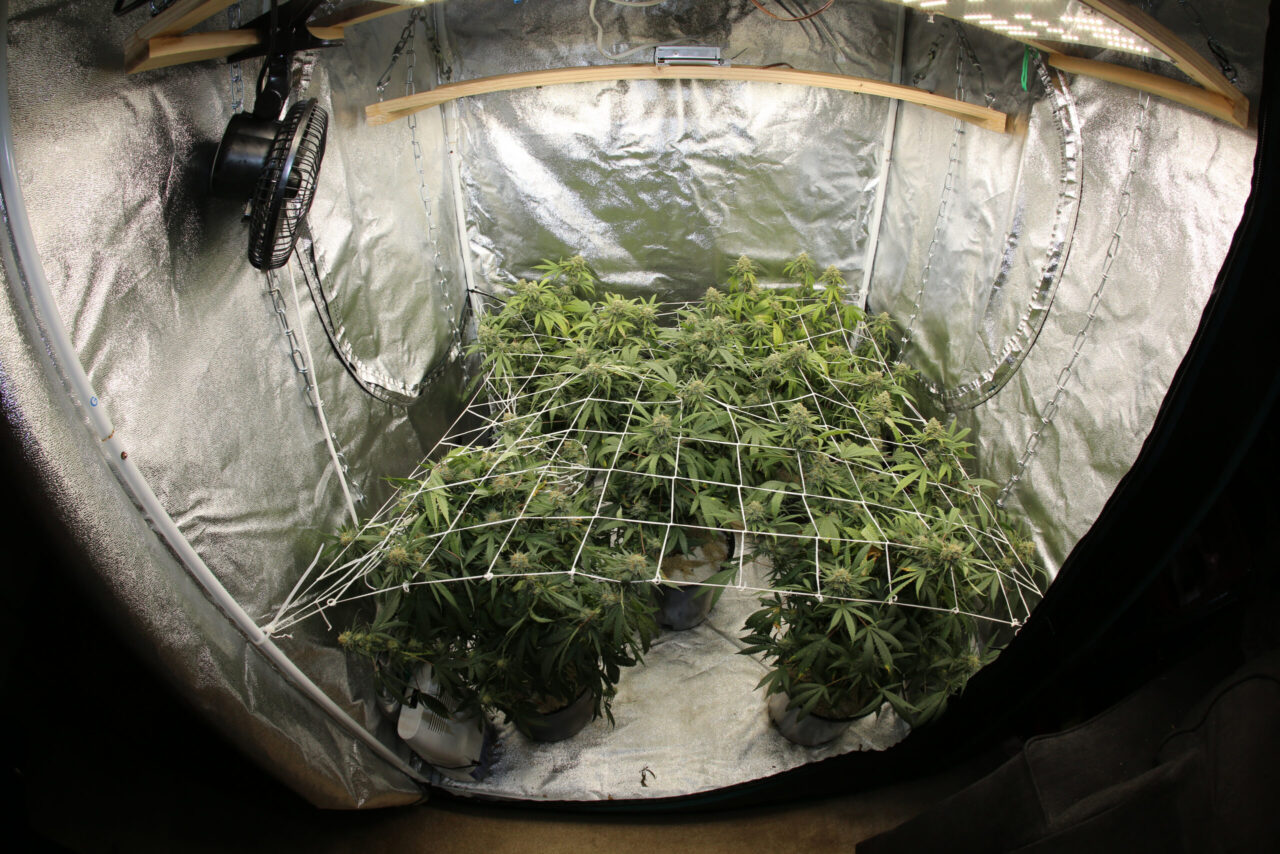
Creating the right environment is like setting the stage for a blockbuster movie. Your grow space needs to be just right for your plants to shine. Think of it as setting up the perfect backstage area, where everything is in place to support a stellar performance.
Choosing Your Grow Space
Your grow space could be a spare room, a closet, a basement, or a dedicated grow tent. Here are a few things to consider:
- Size: Just like an actor needs room to move and perform, your plants need enough space to grow tall and wide. You’ll also need space for your equipment—lights, fans, and room to move around for maintenance. Crowded conditions can lead to stressed plants and reduced yields. So, make sure your space is ample enough for the number of plants you plan to grow.
- Accessibility: You’ll be spending a lot of time with your plants, checking on them daily. Choose a location that’s easy to get to. A space that requires you to crawl or squeeze through tight spots isn’t ideal. You want to be able to walk in, do your thing, and walk out without any hassle.
- Ventilation and Light Control: Think about how you’ll control the environment. Does the space have windows? If so, you’ll need to block out light during the dark periods of the flowering stage. Does it have good natural airflow, or will you need to set up ventilation systems? Proper airflow is crucial to prevent mold and provide fresh CO2 for your plants.
- Stealth and Security: If discretion is important, consider a location that’s out of sight and soundproof. Growing cannabis can be aromatic, and the last thing you want is your neighbors catching a whiff. Basements and closets are great for this reason, as they naturally contain odors better than other areas.
- Cleanliness: Your grow space should be easy to clean. Basements can sometimes be damp or prone to pests, so you’ll need to prepare accordingly. A clean, sterile environment helps prevent pests and diseases, giving your plants the best chance to thrive.
When I first started, I had to make do with a cramped closet. It wasn’t perfect, but I learned the importance of planning and optimizing the space I had. With every grow, you get better at understanding what your plants need and how to provide it.
Temperature Control
![]()
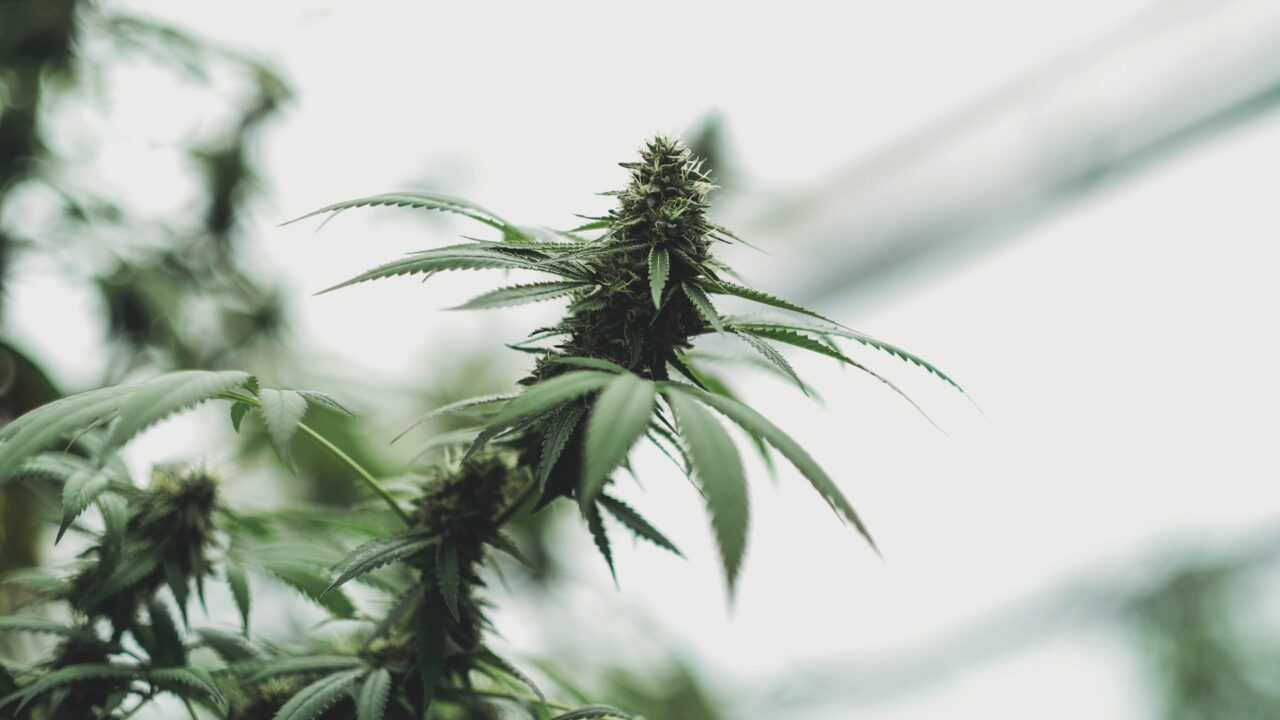
Cannabis plants are like Goldilocks—they want their environment to be just right. Too hot or too cold, and they’ll throw a tantrum. Keeping the temperature in the optimal range is crucial for healthy growth and maximizing yields. Here’s how to do it:
Optimal Temperature
- Vegetative Stage: Aim for 70-85°F. During this phase, plants are actively growing and need warmth to support their vigorous development.
- Flowering Stage: Drop the temperature slightly to 65-80°F. This mimics the natural change in seasons and encourages bud development. Cooler temperatures at night can also help enhance color and resin production.
Equipment Needed
- Thermometer and Hygrometer: Essential tools for monitoring temperature and humidity. Get a digital one with a memory function to track daily highs and lows.
- Exhaust Fan and Intake Fan: Vital for maintaining airflow and temperature control. The exhaust fan removes hot air, while the intake fan brings in fresh, cooler air.
- Heater: Necessary for colder climates or during winter months. Choose a heater with a thermostat to avoid overheating your grow space.
- Air Conditioner: Important for hot climates or if your grow lights generate a lot of heat. Portable air conditioners work well for grow rooms.
Setup and Strategies
- Monitoring: Place your thermometer and hygrometer in your grow space to constantly keep an eye on conditions. Ideally, put them at canopy level where your plants are growing.
- Exhaust and Intake Fans: Install the exhaust fan at the top of your grow space to pull out hot air, and the intake fan at the bottom to bring in cooler air. This setup ensures good airflow and temperature control. For my early grows, these fans were a game changer. They not only helped control temperature but also provided a steady supply of fresh air, which is crucial for healthy plants.
- Heater: Place the heater in a location where it can evenly distribute warmth. Avoid placing it directly next to plants to prevent heat stress. During my time in Humboldt, the winters could get pretty cold, and a reliable heater kept my grow room cozy.
- Air Conditioner: Position the air conditioner where it can effectively cool the entire space. Portable units with adjustable ducts are great for targeting specific areas. In the heat of summer, keeping my grow room cool was a constant battle, but a good air conditioner made all the difference.
Maintaining the right temperature is all about balance. Too high, and your plants might suffer from heat stress, leading to wilting and reduced growth. Too low, and you risk slowing down their metabolism and growth rate. By monitoring conditions closely and using the right equipment, you can create a stable environment that your plants will love.
Humidity Management
Humidity levels can make or break your grow. Young plants love moisture, but too much humidity during flowering can lead to mold. Maintaining the right humidity at different stages of growth is crucial for healthy plants.
Humidity Levels
- Seedling Stage: Keep humidity high, around 65-70%. Young plants need a lot of moisture to help them develop strong roots.
- Vegetative Stage: Moderate humidity, between 40-70%, is ideal. This range supports healthy leaf growth and prevents excess moisture from encouraging mold.
- Flowering Stage: Lower the humidity to 40-50%. This helps prevent mold and mildew on the buds, which can ruin your harvest.
Equipment Needed
- Humidifier: To add moisture if the air is too dry. Ideal for the seedling and vegetative stages.
- Dehumidifier: To remove excess moisture, especially during the flowering stage. A must-have to prevent mold and mildew.
- Thermometer and Hygrometer: Essential tools for monitoring both temperature and humidity levels.
- Exhaust and Intake Fans: Also play a role in managing humidity by improving air circulation and exchanging moist air for fresh air.
Techniques to Control Humidity
- Using a Humidifier: Place the humidifier in a spot where it can evenly distribute moisture. In the seedling stage, keep it running consistently to maintain high humidity levels. For my early grows, I found that a simple, small humidifier worked wonders in a tight space.
- Using a Dehumidifier: Position the dehumidifier where it can effectively lower humidity, especially during the flowering stage. Empty the water reservoir regularly and check that it’s working efficiently. During one particularly humid summer, my dehumidifier was my best friend.
- Monitoring: Place the hygrometer at canopy level to get accurate readings of the humidity where your plants are growing. Check it daily and adjust your humidifier or dehumidifier as needed.
- Ventilation: Proper airflow helps control humidity levels. Your exhaust fan should be running regularly to remove moist air, while the intake fan brings in drier air. Oscillating fans can help circulate air within the grow space, ensuring there are no pockets of stagnant, humid air.
Extra Tips
- Misting: During the seedling stage, you can mist your plants with water to increase humidity. Be careful not to overdo it, as too much moisture can lead to damping-off.
- Water Sources: Make sure there are no open water sources in your grow space, as they can increase humidity. I once made the mistake of leaving an open bucket of water in my grow room, and it spiked the humidity levels overnight.
- Plant Spacing: Proper spacing between plants can improve airflow and reduce humidity around the foliage. Crowded plants can create microenvironments where humidity levels are higher.
Managing humidity is all about maintaining the balance. Too much humidity can lead to mold, while too little can stress your plants. By keeping an eye on your hygrometer and adjusting your equipment accordingly, you can create an environment where your plants can thrive through every stage of growth.
Air Circulation
Stagnant air is a breeding ground for mold and pests. Proper air circulation is vital for maintaining a healthy grow environment. Your plants need a steady supply of fresh air to thrive, and good airflow helps prevent issues like mold, mildew, and pest infestations.
Importance of Air Circulation
- Prevents Mold and Mildew: Good airflow reduces humidity levels around the plants, preventing mold and mildew from forming on leaves and buds.
- Strengthens Plants: A gentle breeze mimics outdoor conditions, encouraging plants to grow stronger stems and branches. This makes them more resilient and able to support heavier buds.
- Regulates Temperature: Air circulation helps distribute heat evenly throughout the grow space, preventing hot spots and ensuring all plants receive consistent temperatures.
- Improves CO2 Levels: Fresh air provides a constant supply of CO2, which is essential for photosynthesis. Plants use CO2 to produce energy, leading to healthier growth and better yields.
Equipment Needed
- Oscillating Fans: Essential for keeping air moving within the grow space. They help prevent stagnant air and ensure even distribution of CO2 and heat.
- Exhaust Fan: Removes stale, hot air from the grow space. Helps control temperature and humidity levels.
- Intake Fan: Brings fresh, cool air into the grow space. Works with the exhaust fan to maintain a steady airflow.
- Carbon Filter (optional): Helps control odors by filtering the air before it exits the grow space. Useful if stealth is a concern.
Setup and Placement
- Oscillating Fans: Place these fans around your grow space to keep air moving. Ideally, position them at different heights to ensure both the canopy and the lower parts of the plants receive adequate airflow. Fans should gently rustle the leaves, not create a strong wind that can damage the plants. In my early grows, I found that placing one fan above and one below the canopy worked best.
- Exhaust and Intake Fans: Install the exhaust fan at the top of your grow space to pull out hot air, and the intake fan at the bottom to bring in fresh air. This setup ensures a continuous flow of air through the space. When I first set up my grow tent, getting the exhaust and intake fans positioned correctly made a world of difference in controlling the environment.
- Carbon Filter: Attach the carbon filter to the exhaust fan if odor control is necessary. This setup will filter out smells before the air exits the grow space, keeping your operation discreet.
Additional Tips
- Check Airflow Regularly: Ensure your fans are working correctly and providing adequate airflow. Adjust their positions as needed to cover all areas of your grow space.
- Clean Fans and Filters: Dust and debris can build up on fans and filters, reducing their efficiency. Clean them regularly to maintain optimal performance. In my experience, a little maintenance goes a long way in keeping the air fresh and clean.
- Avoid Direct Blasts: Position fans so they’re not blowing directly on the plants, as this can cause wind burn. Instead, aim for a gentle breeze that keeps the leaves fluttering.
- Consider CO2 Supplementation: If you have a sealed grow space, adding CO2 can boost plant growth. However, this requires careful management and monitoring to ensure levels stay safe and effective.
Proper air circulation is crucial for a healthy grow environment. By ensuring your plants get a steady supply of fresh air, you’ll help them grow stronger and more resilient. Plus, good airflow helps keep common problems like mold and pests at bay, making your grow more successful.
Lights
Lighting is the powerhouse of your grow operation. It drives photosynthesis, enabling your plants to convert light into energy and grow vigorously. Let’s break down the different types of lights and how to use them effectively.
Types of Grow Lights
Different types of grow lights have unique advantages and drawbacks. Here’s a rundown of the main options:
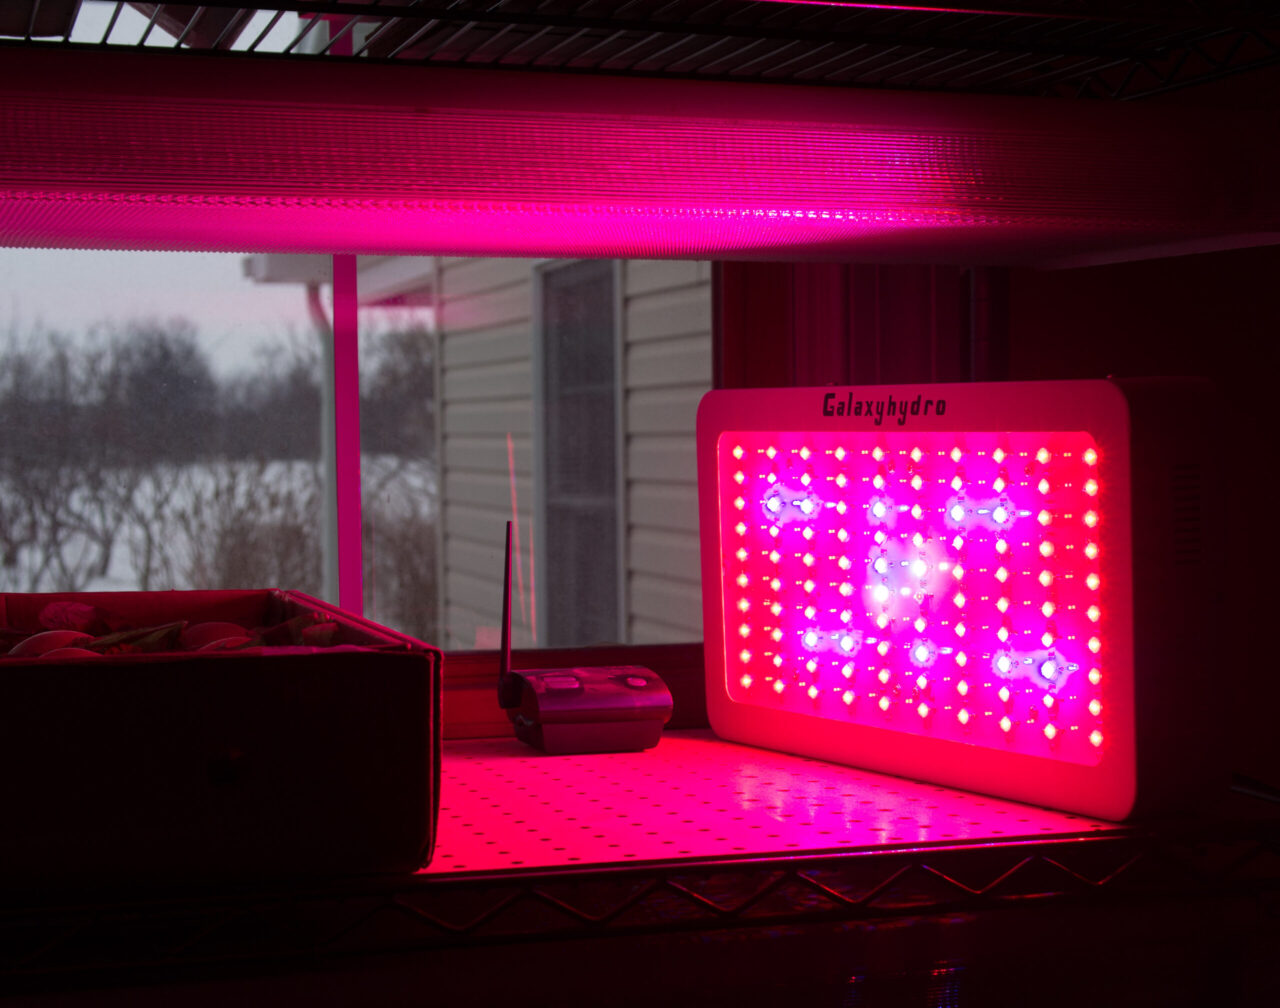
- LEDs (Light Emitting Diodes): These are the new stars of the grow world. LEDs are energy-efficient, produce less heat, and can be customized to emit specific wavelengths. They might be pricier upfront, but they save on electricity and cooling costs in the long run. Plus, they last longer than traditional bulbs. When I switched to LEDs, I noticed my electricity bill dropped significantly, and my plants thrived under the tailored light spectrum.
- HPS (High-Pressure Sodium): HPS lights are fantastic for the flowering stage because they emit a spectrum that encourages bud development. However, they produce a lot of heat, so you’ll need a good cooling system. HPS lights are a classic choice and have been used by growers for decades. I remember my first grow with HPS; the buds were dense and potent, but managing the heat was a challenge.
- MH (Metal Halide): These lights are ideal for the vegetative stage because of their blue spectrum, which promotes leafy growth. Like HPS, they generate a fair bit of heat, so you’ll need to manage temperatures carefully. MH lights are great for getting robust, bushy plants. Using MH lights helped me achieve lush, healthy foliage, setting the stage for a strong flowering phase.
- Fluorescent Lights: Best for seedlings and clones, fluorescents are low-intensity and don’t produce much heat. They’re not powerful enough for the full growth cycle but are perfect for the early stages when plants are small and delicate. I started many a grow with simple fluorescent tubes before upgrading to more powerful lights.
Installing Your Lights
Setting up your lights correctly is crucial for maximizing growth and yield.
- Equipment Needed:
- Grow lights (LED, HPS, MH, or fluorescents)
- Light hangers or adjustable ratchet ropes
- Timer
- Setup Instructions:
- Hanging Lights: Hang your lights above the plants using adjustable ratchet ropes. This allows you to easily raise or lower them as your plants grow. LEDs can be placed 12-24 inches away, while HPS and MH lights should be 18-36 inches away to prevent heat stress. I remember burning my first batch of plants because I had the lights too close—lesson learned!
- Adjusting Height: Start with the lights higher and gradually lower them as the plants grow. This encourages the plants to stretch and grow evenly. Monitor the distance regularly to ensure the tops of your plants aren’t getting too hot.
- Setting Up a Timer: Use a timer to automate your light schedule. During the vegetative stage, set the timer for 18 hours of light and 6 hours of darkness. For flowering, switch to 12 hours of light and 12 hours of darkness. Consistency is key to keeping your plants on a steady growth cycle.
Light Intensity and Coverage
Ensuring your plants get the right amount of light is crucial for healthy growth.
- Importance of Measuring Light Intensity: Light intensity affects how well your plants photosynthesize. Too little light, and they’ll be weak and spindly; too much, and you risk burning them. A PAR (Photosynthetically Active Radiation) meter can help measure the light intensity your plants receive. I once underestimated the light intensity, and my plants ended up with light burn—don’t make that mistake!
- Adjusting Light Intensity: Use a PAR meter to ensure your plants are getting the right amount of light. Aim for 400-600 µmol/m²/s during vegetative growth and 600-900 µmol/m²/s during flowering. Adjust the height and positioning of your lights to ensure even coverage across the entire canopy.
- Ensuring Even Coverage: Ensure your lights cover the entire grow space evenly. This prevents some plants from getting too much light while others don’t get enough. I’ve used reflective materials like Mylar on the walls to bounce light back onto the plants and improve coverage. In one of my early grows, I had dark corners in my tent, and those plants lagged behind until I added reflective material.
Additional Tips
- Avoid Light Leaks: During the flowering stage, make sure your grow space is completely dark during the 12-hour dark period. Even a small light leak can disrupt the flowering cycle and stress your plants. I once had a tiny light leak from a power strip, and it caused my plants to re-veg—lesson learned!
- Supplemental Lighting: If you notice dark spots in your grow space, consider adding supplemental lights to ensure even coverage. Small LED panels or fluorescent lights can help fill in those gaps.
- Cooling: If you’re using HPS or MH lights, ensure you have adequate cooling. These lights generate a lot of heat, and without proper ventilation, you could end up with heat-stressed plants. I’ve had to add extra fans and even an air conditioning unit to keep my grow room cool in the peak of summer.
Proper lighting is essential for growing healthy, productive cannabis plants. By choosing the right lights and setting them up correctly, you can create an environment where your plants can thrive and produce bountiful harvests.
Nutrients

A few years back, I had a grow that seemed perfect—until it wasn’t. The plants started showing strange symptoms: yellowing leaves, slow growth, and what looked like nutrient deficiencies. I was stumped. I was feeding them regularly, but they just weren’t thriving. Turns out, it was nutrient lockout. This happens when the pH levels are off or there’s a buildup of salts, preventing the plants from absorbing the nutrients they need. It was a hard lesson, but it taught me the importance of understanding and maintaining the right nutrient balance. Let’s make sure you don’t have to learn the hard way like I did.
Understanding Nutrient Basics
Cannabis plants need a balance of macronutrients and micronutrients.
- Macronutrients: These are the primary nutrients your plants need in larger quantities.
- Nitrogen (N): Essential for vegetative growth. It helps produce lush, green foliage.
- Phosphorus (P): Crucial for root development and flowering. It supports bud formation and overall plant health.
- Potassium (K): Important for overall plant vigor. It helps with water uptake, enzyme activation, and disease resistance.
- Micronutrients: These are needed in smaller amounts but are still crucial for plant health.
- Calcium: Important for cell wall structure and root development.
- Magnesium: Central component of chlorophyll, which is essential for photosynthesis.
- Iron: Necessary for enzyme function and chlorophyll synthesis.
Developing a Nutrient Schedule
Creating a nutrient schedule involves timing and balance to meet your plants’ needs at different stages of growth.
- Vegetative Stage: Use a nutrient solution high in nitrogen. Feed your plants every 1-2 weeks, starting with a low dose and gradually increasing as they grow. This stage is all about building a strong foundation with lots of healthy foliage.
- Flowering Stage: Switch to a bloom formula with higher phosphorus and potassium. Continue feeding every 1-2 weeks, but keep an eye on your plants. Overfeeding can lead to nutrient burn, while underfeeding can cause deficiencies. This stage focuses on bud development and resin production.
Equipment Needed
- Nutrient Solutions: Both vegetative and bloom formulas.
- Measuring Tools: Syringes or measuring cups to ensure accurate dosing.
- pH Meter and pH Up/Down Solutions: To monitor and adjust the pH of your nutrient solution.
Maintaining pH Levels
The pH of your nutrient solution is crucial for nutrient uptake. If the pH is off, your plants can’t absorb the nutrients they need, even if they’re present in the soil or water.
- Optimal pH Ranges:
- Soil: 6.0-7.0
- Hydroponics: 5.5-6.5
- Monitoring: Use a pH meter to test the pH of your nutrient solution and runoff water. Check it regularly and adjust as needed using pH up or down solutions. I’ve seen many grows go south because the pH was neglected. Don’t let that be you!
- Adjusting pH: If your pH is too high, use a pH down solution to lower it. If it’s too low, use a pH up solution. Adjust gradually and recheck until you’re within the optimal range.
Extra Tips
- Start Slow: When feeding your plants, start with a lower dose and gradually increase it. It’s easier to fix a slight deficiency than to recover from nutrient burn. I remember scorching a batch of plants by jumping straight to full-strength nutrients—never again!
- Observe Your Plants: They’ll tell you if something’s off. Yellowing leaves might indicate a nitrogen deficiency, while burnt tips can signal overfeeding. Keep an eye on their color, growth rate, and overall health.
- Flush Occasionally: Every few weeks, give your plants plain water to flush out any built-up salts or excess nutrients. This helps prevent nutrient lockout and keeps the soil fresh. In my experience, regular flushing has kept my plants happy and my harvests plentiful.
- Tailor to Strains: Different strains might have slightly different nutrient needs. Some might be heavier feeders, while others prefer lighter doses. Keep notes and adjust based on your plants’ responses.
Feeding your cannabis plants is all about providing the right nutrients at the right time. By developing a solid nutrient schedule and keeping an eye on pH levels, you’ll ensure your plants get the fuel they need to grow strong and produce a bountiful harvest.
Monitoring and Adjustments
Once your grow setup is complete, it’s all about regular monitoring and making adjustments as needed. Keeping a close eye on your plants and environment ensures that you catch any issues early and maintain optimal growing conditions.
Daily Checks
Every day, take a few minutes to inspect your grow space and plants. This helps you stay on top of any changes and address problems before they escalate.
- Temperature and Humidity Levels: Check your thermometer and hygrometer to ensure temperature and humidity are within the ideal range. Make adjustments as necessary using your heater, air conditioner, humidifier, or dehumidifier. Consistency is key to a stable growing environment.
- Inspecting Plants: Look closely at your plants for any signs of pests, disease, or nutrient deficiencies. Healthy plants should have vibrant, green leaves. Yellowing, spots, or curling can indicate issues that need to be addressed. I always say, a quick daily check can save you from a massive headache down the road.
- Ensuring Proper Light Height and Intensity: Verify that your lights are at the correct height and providing even coverage. Adjust as your plants grow to maintain optimal light intensity and prevent burn.
Weekly Maintenance
In addition to daily checks, dedicate some time each week to deeper maintenance tasks. This keeps your grow environment clean and your plants healthy.
- Cleaning Grow Space and Equipment: A clean grow space is crucial for preventing mold and pests. Wipe down surfaces, clean fans, and remove any dead leaves or debris. This routine upkeep makes a huge difference. Back in my early grows, skipping this step led to an unexpected pest infestation—never again.
- Calibrating pH Meter: Ensure your pH meter is providing accurate readings by calibrating it regularly. This helps you maintain the correct pH levels for your nutrient solution and prevents nutrient lockout.
- Adjusting Nutrient Feeding Schedules: Review your nutrient feeding schedule and make any necessary adjustments based on your plants’ growth and health. As plants grow, their nutrient needs change, so stay flexible and responsive.
Extra Tips
- Keep a Grow Journal: Documenting your daily checks and weekly maintenance helps you track your grow’s progress and identify patterns. Note down temperatures, humidity levels, nutrient feedings, and any issues you observe. This record becomes invaluable for improving future grows.
- Stay Observant: Your plants will communicate with you through their appearance. Pay attention to subtle changes and act quickly if something seems off. Healthy plants should be vibrant and growing steadily.
- Adjust and Adapt: Every grow is a learning experience. Be ready to adapt your strategies based on what you observe. If something isn’t working, don’t be afraid to change it up. Experimentation and flexibility are key to becoming a better grower.
Monitoring and adjusting your grow is all about staying proactive and attentive. By keeping a close eye on your plants and environment, and making necessary tweaks, you’ll ensure a healthy, productive grow. Remember, it’s the small, consistent efforts that lead to big rewards in the end.

Mike Titan, the founder of Titan Seeds, is a seasoned cannabis cultivator and the mastermind behind the comprehensive grow guide available on the Titan Seeds website.